
Roswell Wood Flooring handles hardwood floor staining in Roswell, GA, serving surrounding cities including Alpharetta, Dunwoody, Milton, Sandy Springs and Johns Creek. After more than 20 years of choosing colors with homeowners, we rely on one rule above all: stain samples go on your own sanded floor, in your own light, before a color is chosen for the whole room.
Stain is where most refinishing disappointments start. A color chosen from a small chip in a store rarely looks the same across several hundred square feet of your species, under your windows and next to your cabinets. Sanding technique, the species and even the direction of the light all change how a stain reads. Sampling on the real floor takes an extra step, but it is the step that makes the color right.
A color change also starts with a check of the floor itself. Every stain job requires a full sanding to bare wood, so we measure the wood left above the tongue before promising a new color, particularly on floors that have been refinished before.
Choosing a Stain Color
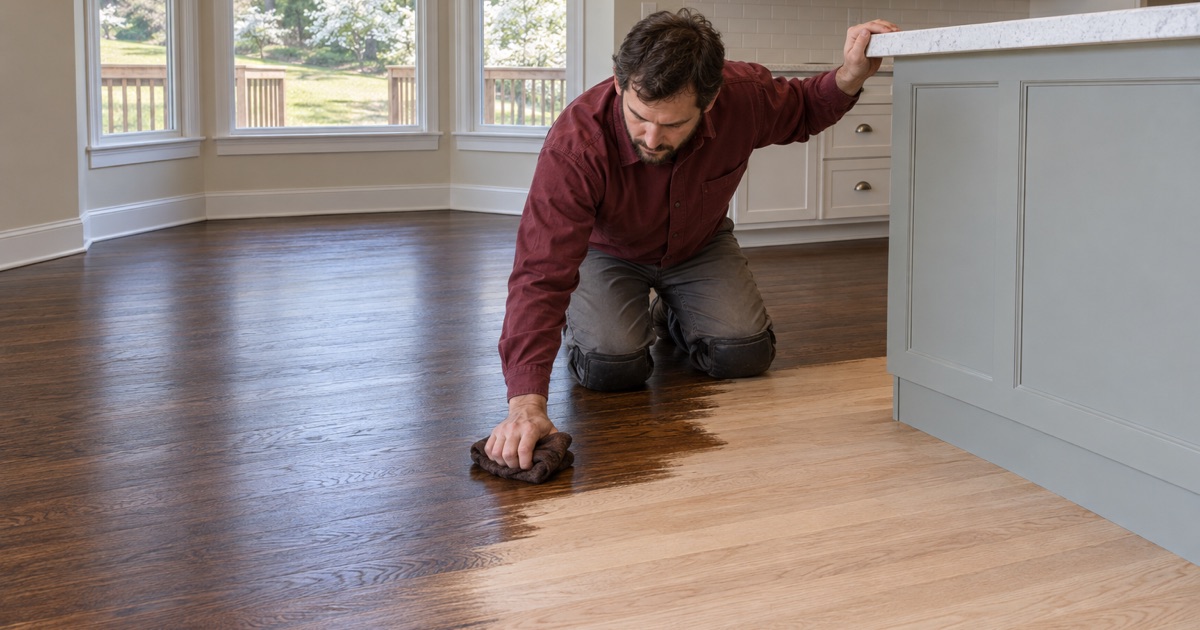
Samples on Your Own Floor
After sanding, we apply several stain samples side by side on your bare floor, usually near a window and in a darker part of the room. You can see how each color looks in morning and evening light and beside your trim, cabinets and furniture. We add finish to the samples so you see the final color, not just the wet stain.
It is common to narrow the choice to two colors and then mix a custom blend between them. Once you have chosen, the sample area is sanded again so the whole floor is stained evenly in one pass.
Popular Colors for Oak Floors
Many homes still have red oak finished in the golden and honey tones that were common decades ago. Today, homeowners often choose warm browns, natural tones with no stain at all, or brown-gray blends that feel current without chasing a trend. Darker colors such as espresso look dramatic but show dust, scratches and pet hair more readily.
We talk through how each color will live day to day, not only how it looks when the room is empty. Kids, pets and busy entries all push toward mid-tone colors that hide daily wear.
How Species Changes the Color
The same stain looks different on different species. Red oak has a pink undertone and open grain that takes stain deeply. White oak is cooler and more neutral, so gray and natural tones read truer on it. Maple and pine are dense in some areas and soft in others, which affects how evenly they absorb color.
When a house has more than one species, such as oak floors with maple in a kitchen, we sample on each so the colors look intentional together rather than accidentally mismatched.
Getting an Even Stain
Sanding for Stain
Stain exaggerates every sanding mark, so the sanding has to be right before the first drop of color goes down. We work through a full grit sequence with the drum sander and edger, then finish with an orbital sander to remove swirl marks and chatter. Scratches invisible on bare wood can show up clearly once stained.
We also look closely at edges and corners, where different machines meet the main floor. Uneven sanding there shows as a darker or lighter frame around the room once the stain is on.
Water Popping for Deeper Color
Water popping means dampening the sanded floor so the grain opens slightly before staining. It helps the wood absorb more stain, producing a richer, more even color, especially with darker stains on oak. It also helps reduce blotchiness on some species.
The floor must dry completely before stain goes on, and humidity affects how long that takes. We control the timing carefully, since staining a floor that is still damp can cause uneven color.
Preventing Blotches on Maple and Pine
Maple and pine are the most challenging species to stain. Their uneven density causes blotches and streaks, particularly with dark colors. We use conditioners, water popping, lighter colors or dye-based products, and we always test on the floor first.
Sometimes the honest recommendation for maple is a clear finish or a very light tone. We explain what each species will and will not do well, so you can make a choice you will be happy with for years.
After the Stain
Sealing and Finishing
Once the stain is dry, we seal it with the finish you choose, from waterborne polyurethane to oil-modified polyurethane or hardwax oil. The finish affects the final color too: oil-modified finishes add amber warmth that deepens with time, while waterborne finishes stay clearer. We show you both over your chosen stain.
That interaction matters most with light and gray colors. A pale gray stain under an oil-modified finish can turn noticeably yellow, while the same stain under a waterborne finish keeps its cool tone. For warm browns, the amber from an oil-modified finish often improves the color rather than fighting it.
Sheen and Maintenance
Sheen changes how color reads. Matte and satin make colors look softer and hide scratches, while semi-gloss deepens color but shows every mark. We help you choose the sheen alongside the stain, and we leave care instructions so the finish keeps protecting the color for years.
Stained floors also fade and wear in sunny rooms and busy lanes. A screen and recoat every few years adds a fresh layer of finish over the color before the wear reaches the stain. Once the stain itself wears through, bringing the color back evenly means sanding the room again, so maintaining the finish protects the investment in the color.
- 20+ Years on Wood Floors
- Moisture Read Before Sanding
- Stain Samples on Your Floor